
Peel & Stick Wall Mural Installation Guide
..
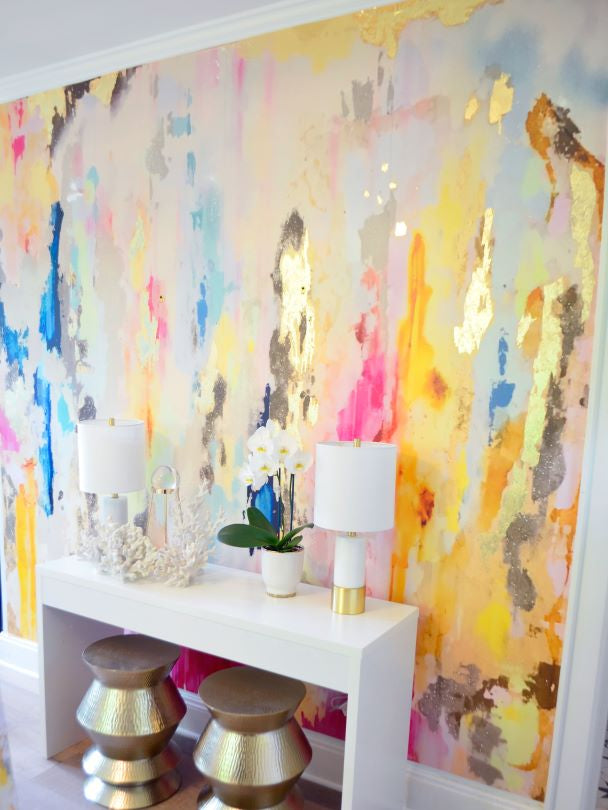
Murals are a unique way to transform a room or wall. They are commonly found in resorts, boutiques, gyms, restaurants, and residential homes. Removable wall murals should be applied onto a flat, smooth surface. This step by step guide will show you how to easily apply removable wall murals, custom cuts, and techniques for simpler, accurate installation. To see our wall mural collection, click here.
What you will need:
- Step stool
- Laser level
- Handy Scraper - Click here to see why a Handy Scraper is essential
- Hand towel
- Painters tape
For the best results have 1-2 people hanging the Removable Wall Mural working left to right
Prep Your Wall:
We suggest wiping the wall with a microfiber cloth even if it appears clean, as this will help tremendously with the adhesion of the removable wall mural. Measure the desired location for which the wall mural will be hung. Layout each panel starting from left to right (on the top back of each panel is numbered.) Locate any obstructions such as doors, windows, outlets, and light switches.
If you are hanging from the ceiling or molding, skip this step - With a pencil, indicate guidelines marks on the wall where the top of the Removable Wall Mural will be hung. Using a level or laser guide, create a straight, even line that is parallel to the floor.
Install The Removable Wall Mural:
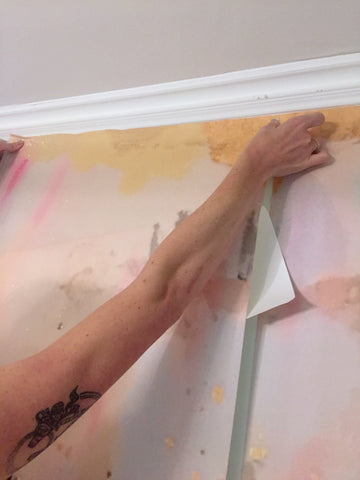
Start by hanging the first panel on the far left. At the top of the panel, peel back the plastic film about 3-5 inches, exposing the adhesive side. For best results, be sure to peel back the same amount of the left and right side of the panel. Apply the top of the mural to the under the ceiling, molding, or level line. With firm pressure in the center, push outward to remove air pockets for a smooth application.
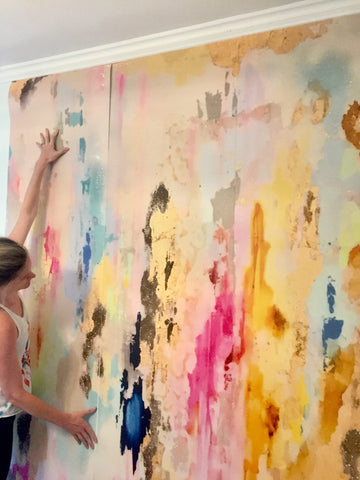
Let the panel hang and slowly peel back the plastic covering about 5-12 inches exposing the sticky adhesive. Use the Handy Scraper to apply the wall mural in a vertical motion, pushing out any air pockets for a smooth adhesion. Slowly and steadily work your way down. If you choose to use a hand towel to attach the mural swipe horizontally back and forth. slowly and steadily work your way down.
To line up the next panel, eliminate gaps, overlays, and the panel shifting by taping the mural down using blue painter's tape — repeat application.
Gold or Silver Leaf
Use the sponge brush and glue, apply on the glue onto the mural in a thin layer (to prevent dripping). Allow the glue to sit for 15-60 minutes. Press the gold leaf to the tacky glue.
Custom Cutouts:
During installation, if the mural extends onto a window or door, use a ceramic utility knife and trim down the overlay. If there is an outlet or light switch, remove the cover plate before installing the mural. Hang the panel as usual. When you are meet the outlet or light switch, slowly cut out the area and keep applying the mural. If you are finding it hard to remove air bubbles at your cutout site, try a small 45 degree cut on the corner of the cutout.
When installing under a window, measure from the bottom on up and precut your mural before installing.